Full Tutorial — Deploying Helm Charts in Kubernetes with Terraform
I previously created a video on Terraform. However, at the time, I was completely new to Terraform. Thus, I thought it would be really valuable to create an updated guide on using Terraform. Once you go through the "basics" it becomes easier to use Terraform for more advanced use cases. Specifically, in this tutorial, I will highlight how to use Terraform for Helm deployments.
Below is the video tutorial that follows this blog post. Feel free to use either resource.
What is Terraform?
Let's quickly recap. Here is the definition by HashiCorp — who created Terraform;
Terraform is an open-source infrastructure as Code software tool that provides a consistent CLI workflow to manage hundreds of cloud services. Terraform codifies cloud APIs into declarative configuration files.
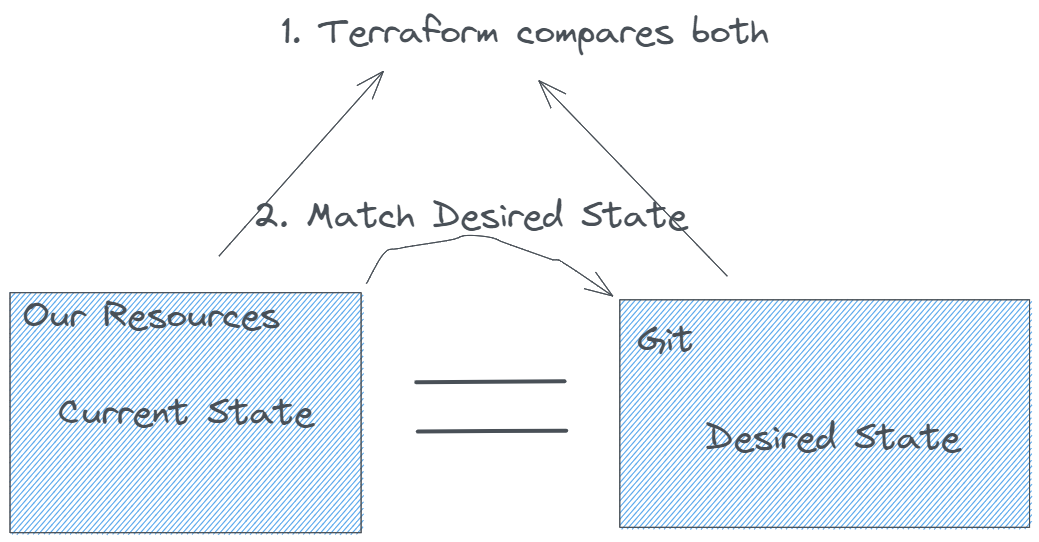
Meaning, Terraform can be used as an Infrastructure as Code tool to manage our entire infrastructure and the resource we deploy on it. Resulting, all of our resources can be declared and tracked in Git — this, in turn, makes it possible to follow GitOps best practices whereby our single point truth for all of our resources is Git. To learn more about GitOps, please have a look at this article.
What are we going to cover?
While there are lots of introductory videos, I feel like what is missing is a video that would show the entire process for using Terraform, not only to manage your infrastructure but also to create and manage your workloads on Kubernetes. To follow this tutorial, you do not need to have any Terraform experience. However, I highly suggest you have a look at my previous videos and content on Helm:
This tutorial is taking a look at
- Installing Terraform
- Creating a Kubernetes cluster with Terraform
- Creating a Helm Chart for our application
- Testing our Helm Chart with Datree
- Deploying our Helm Chart to our cluster
You can find all the resources that we are going to create in the following Git repository.
So let's get started! 🎉
Installing Terraform
First, you want to make sure that you have the Terraform CLI installed. You can find the documentation on the Terraform docs. I would recommend having brew installed and using brew:
brew tap hashicorp/tap

brew install hashicorp/tap/terraform
Pro tip: You can also install brew for Linux
If you are already using Terraform, make sure to upgrade to the latest version:
brew update

brew upgrade hashicorp/tap/terraform
Now run 'terraform' just to make sure that you have it installed and it is working properly:

Creating a Kubernetes cluster with Terraform
First, we want to create a cluster on which we can then deploy our Helm chart.
In my case, I am going to use Civo, however, you can also use other cloud providers. If you want to use the Azure Kubernetes Service, you could for example Google "Azure Terraform Provider" to find the provider documentation. The documentation will tell you how to create a Kubernetes cluster on the given provider. To follow this exact tutorial, go ahead and set up a new Civo Account. With every new sign-up, you will get $250 worth of credits.
To set up the Civo Terraform provider, we will need the API Key. You can find your Civo API key in Account > Settings > Security.
Now create a provider.tf file and paste in the following content:
provider "civo" {
  token = <your API token>
}

terraform {
  required_version = ">= 0.13.0"
  required_providers {
    civo = {
      source = "civo/civo"
    }
  }
}

provider "kubernetes" {
  host     = data.civo_kubernetes_cluster.cluster.api_endpoint
  client_certificate = base64decode(
    yamldecode(civo_kubernetes_cluster.cluster.kubeconfig).users[0].user.client-certificate-data
  )
  client_key = base64decode(
    yamldecode(civo_kubernetes_cluster.cluster.kubeconfig).users[0].user.client-key-data
  )
  cluster_ca_certificate = base64decode(
    yamldecode(civo_kubernetes_cluster.cluster.kubeconfig).clusters[0].cluster.certificate-authority-data
  )
}
Next, replace <your API token> with your actual API token.
Once you have the file, go ahead and run the following command to initialize the provider.
terraform init
Awesome, now we can move to the next step of creating our Kubernetes cluster and then creating our Helm Chart.
Creating and managing your Kubernetes cluster through Terraform
Create a new file called cluster.tf or similar
resource "civo_kubernetes_cluster" "cluster" {
  name              = "terraform-example"
  applications      = ""
  num_target_nodes  = 3
  target_nodes_size = element(data.civo_instances_size.small.sizes, 0).name
  region            = "LON1"
}

data "civo_kubernetes_cluster" "cluster" {
  name = civo_kubernetes_cluster.cluster.name
}

data "civo_instances_size" "small" {
    filter {
        key = "type"
        values = ["kubernetes"]
    }
}
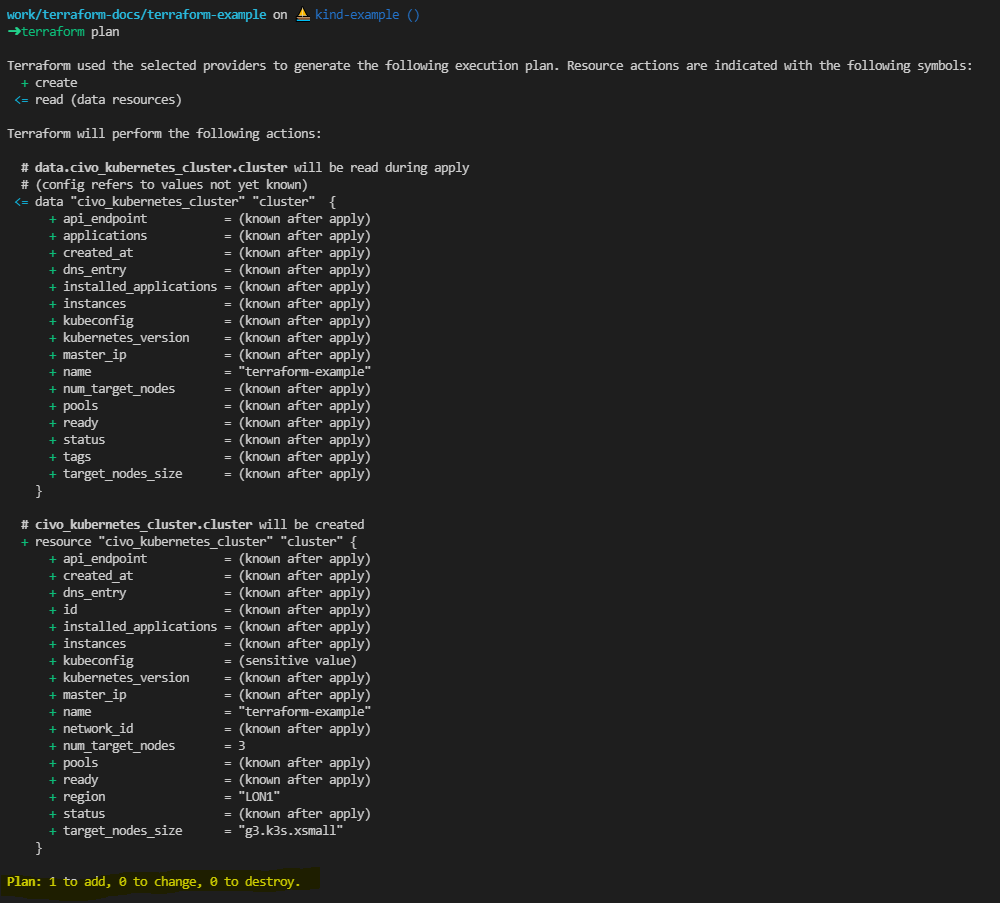
Now we can already go ahead and deploy the resource. To see any changes between the current state of your infrastructure and its desired state, run:
terrafor plan
This command will show you any resources that terraform has to change, create, or destroy that the current state of your infrastructure matches the desired state defined in Terraform.
You should see an output similar to the following:
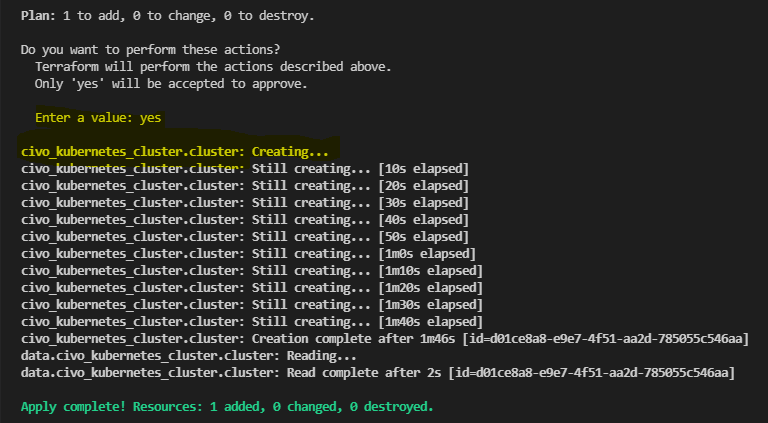
If you are happy with the changes that terraform will make within your cluster, run the following command:
terrafrom apply
This will tell Terraform that you are ok with the changes that it is going to make.
Let's go one step further and set up a variables.tf file in which we can dynamically define the variables that we want to use within our terraform deployment.
in that file, we are going to post something like:
variable "civotoken" {
  default = "<replace with your token"
  type = string
}

variable "cluster_name" {
  default = "terraform-example"
}

variable "cluster_nodes" {
  default = "3"
}

variable "region" {
  default = "LON1"
}

variable "applications" {
  default = ""
}
Now we can update the values in the cluster.tf file with "var.name_of_the_variable" so for instance, our cluster.tf file will now become:
resource "civo_kubernetes_cluster" "cluster" {
  name              = var.cluster_name
  applications      = var.applications
  num_target_nodes  = var.cluster_nodes
  target_nodes_size = element(data.civo_instances_size.small.sizes, 0).name
  region            = var.region
}

data "civo_kubernetes_cluster" "cluster" {
  name = civo_kubernetes_cluster.cluster.name
}

data "civo_instances_size" "small" {
    filter {
        key = "type"
        values = ["kubernetes"]
    }
}
Don't forget to also update the Civo token reference in the provider.tf file with "var.civotoken".
Making this change early on will allow us to dynamically define values over time, which will potentially save us a lot of struggle later on.
Adding the Helm Provider
Helm is a really powerful Kubernetes-based tool. Most of our cloud-native applications have a Helm Chart that can be used to configure, install and manage our application. Think about Helm as a package manager for your cloud-native applications.
For this example, we will install the Prometheus Operator Helm Chart through Terraform and then also a custom Helm Chart.
You can find the Helm Provider documentation here: https://registry.terraform.io/providers/hashicorp/helm/latest/docs
We can add the Helm Provider in our provider.tf file with the following lines:
provider "helm" {
    kubernetes {
    host     = data.civo_kubernetes_cluster.cluster.api_endpoint
    client_certificate = base64decode(
      yamldecode(civo_kubernetes_cluster.cluster.kubeconfig).users[0].user.client-certificate-data
    )
    client_key = base64decode(
      yamldecode(data.civo_kubernetes_cluster.cluster.kubeconfig).users[0].user.client-key-data
    )
    cluster_ca_certificate = base64decode(
      yamldecode(data.civo_kubernetes_cluster.cluster.kubeconfig).clusters[0].cluster.certificate-authority-data
    )
  }
}
As you can see, this is pretty similar to our Kubernetes provider configuration just that the information is passed into the Helm provider.
Since we are adding the provider, we have to run the following command again to initialise it:
terraform init
Where does the data to allow Helm to connect to our Civo Kubernetes Cluster come from?
Earlier, we defined our Civo Kubernetes cluster and stored the information in a data object. You can query the object. First, have a look at the Terraform State that Terraform currently knows about and tracks:
terraform state
This will give you a list of objects.
Next, open up the terraform console:
terraform console
And lastly, pass in one of the data objects that have been returned by querying the Terraform State:
data.civo_kubernetes_cluster.cluster
This should return all of the values known to your Kubernetes cluster.
Creating a Helm Release
Next up, we are going to create a new directory within our folder that will keep all of our custom Helm Charts:
- charts — in this directory we are going to create all of our custom Helm Charts
First, we are going to add a custom Helm chart to the charts directory. For this, I am going to add the example Helm Chart that comes with the Helm create command. You can either follow the steps outlined below or add your own custom charts into the charts directory.
cd charts
helm create nginx
You should now see the nginx example chart provided by Helm, ready to be deployed.
Test Chart Manifests with Datree
Datree helps us to prevent Kubernetes misconfigurations from reaching production. When we add a new Helm Chart or other Kubernetes-based resources, we want to make sure that those are configured correctly before deploying them.
I have done an entire video on Datree before. So if you want to learn more about Datree, I highly suggest you have a look at that:
Datree provides a helm integration that allows us to check the manifests that will be created through our Helm Chart.
If you do not have Datree installed yet, go ahead and add it by running the following command:
curl <https://get.datree.io> | /bin/bash
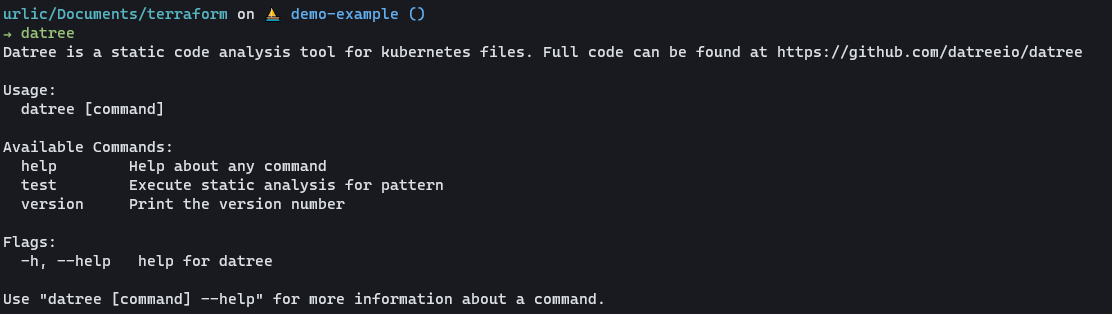
Now, when you run "datree" you should see a list of options in your CLI:
Now you can test Kubernetes manifests by running:
datree test ./file.yaml
However, to test our Helm Chart, we are going to use the Help plugin directly. Helm plugins can be used to extend the functionality of Helm. Let's go ahead and add the Datree Helm integration:
helm plugin install <https://github.com/datreeio/helm-datree>
Once added, we can test our Helm chart directly. From the root directory run:
helm datree test ./charts/nginx
This should give us output similar to the following:
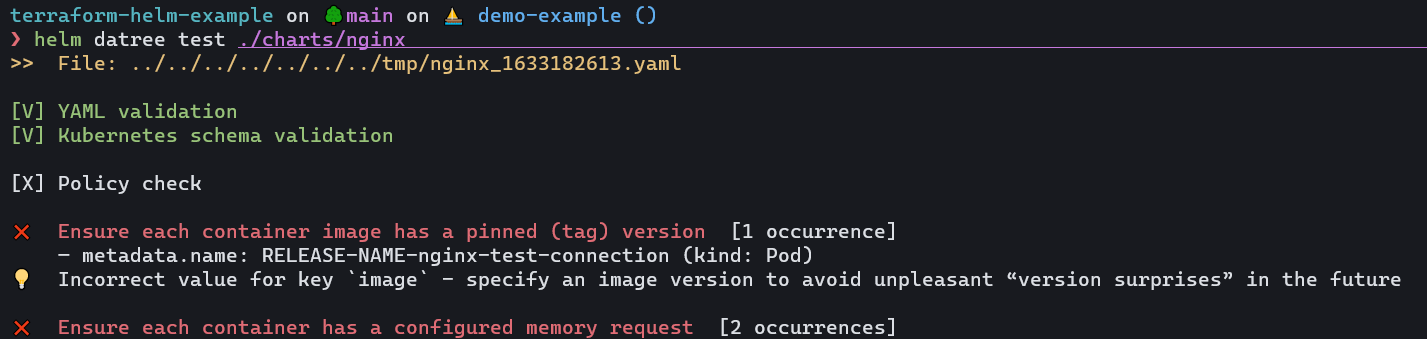
Once we know about the policies that have not passed our check, we can improve our Helm Chart.
Using Datree we can not only test our deployments manually on our local environment but integrate them as part of our CI/CD pipeline once we automate the process.
Setting up an account is free and will provide you with further insights on your deployments.
Add Helm Release
Next, let's add our Terraform Helm releases. These are going to make sure that our Helm charts are going to be deployed. Add the following files within your root repository:
helm_release_nginx.tf
resource "helm_release" "nginx" {
  name        = "nginx"
  chart       = "nginx"
  repository  = "./charts"
  namespace   = "application"
  max_history = 3
  create_namespace = true
  wait             = true
  reset_values     = true
}
helm_release_prometheus.tf
resource "helm_release" "prometheus" {
  name             = "prom"
  chart            = "kube-prometheus-stack"
  repository       = "https://prometheus-community.github.io/helm-charts"
  namespace        = "monitoring"
  version          = "17.1.3"
  create_namespace = true
  wait             = true
  reset_values     = true
  max_history      = 3
}
And lastly, we can install the charts through Terraform. First run the following command to see the resources that will be created:
terraform plan
You should see three resources that will be created. Now apply those resources:
terraform apply
And voila! We have our Kubernetes Cluster created and the Helm Charts within installed.
Let's recap
In this tutorial, we have set up a completely new repository to manage our infrastructure and application deployment through Terraform. We learnt:
- How to use Terraform
- How to initialise providers
- Defined our infrastructure resources
- Set up a custom Helm Chart and manage it through Terraform
- Test our Kubernetes deployments with Datree.
Sharing is caring 🤗
These tutorials take a long time to prepare. If you enjoyed it, I would highly appreciate seeing a Twitter post from you or similar. It would mean a lot to me.