
Introduction to GitHub Actions
GitHub Actions – AH so much fun!!
Yeah, I might not be the best person to look for advice about this tool. And, to be honest, comparing GitHub actions with other CI/CD tooling, paid tooling, to get GitHub Actions working requires a lot more trial and error. Howevere, this is primarily due to it being such a versatile tool.
Anyway, knowing how to set up automation pipelines is a crucial skill in many, if not all, engineering related jobs.
So here is an overview of GitHub Actions.
Why do you want to start with GitHub Actions?
- The chances are very high that you will have to use GitHub Actions at one point in your career.
- The skills you learn through GitHub actions are aplicable to other CI/CD pipelines as well.
- There are so many resources available about using GitHub actions that you should not have many problems getting started.
- It is free to use as part of your GitHub account.
Structure of GitHub Actions – Terminology
If you want to automate specific tasks for one of your GitHub repositories, you can create a new workflow for it.
This is done under a .github/workflows directory in your GitHub respository.
What is a workflow?
Let's look at some of the terminology around GitHub Actions. A workflow consists of a set of jobs that will run once the workflow is triggered. The GitHub documentation on this is pretty good. Workflows can either be:
- Triggered automatically, for example if new code is merged into the main branch
- Triggered manually, e.g. you decide you want to run the workflow
- Triggered based on a predefined schedule
Usually, a trigger is also referred to as an event. You can read more on triggering workflows here.
What are Jobs in GitHub workflows?
Jobs consist of one or many actions that are supposed to be performed within the job. Jobs can either run in sequential order or ins a specific order e.g. if one job is dependent on another job. The documentation has more information on Jobs.
Example Workflow
The workflow below has the following tasks:
- Checkout my code base
- Log into my Docker Hub Account
- Build my container image and Push it to Docker Hub
- Scan my container image for vulnerabilities with Trivy.
You can find the workflow in the following repository.
name: build-and-scan
on:
push:
branches:
- main
jobs:
docker:
runs-on: ubuntu-latest
steps:
-
name: Checkout
uses: actions/checkout@v3
-
name: Set up QEMU
uses: docker/setup-qemu-action@v2
-
name: Set up Docker Buildx
uses: docker/setup-buildx-action@v2
-
name: Login to Docker Hub
uses: docker/login-action@v2
with:
username: ${{ secrets.DOCKERHUB_USERNAME }}
password: ${{ secrets.DOCKERHUB_TOKEN }}
-
name: Build and push
uses: docker/build-push-action@v4
with:
context: .
platforms: linux/amd64,linux/arm64
push: true
tags: docker.io/anaisurlichs/cns-website:${{ github.sha }}
-
name: Run Trivy vulnerability scanner
uses: aquasecurity/trivy-action@master
with:
image-ref: 'docker.io/anaisurlichs/cns-website:${{ github.sha }}'
format: 'table'
exit-code: '0'
ignore-unfixed: true
vuln-type: 'os,library'
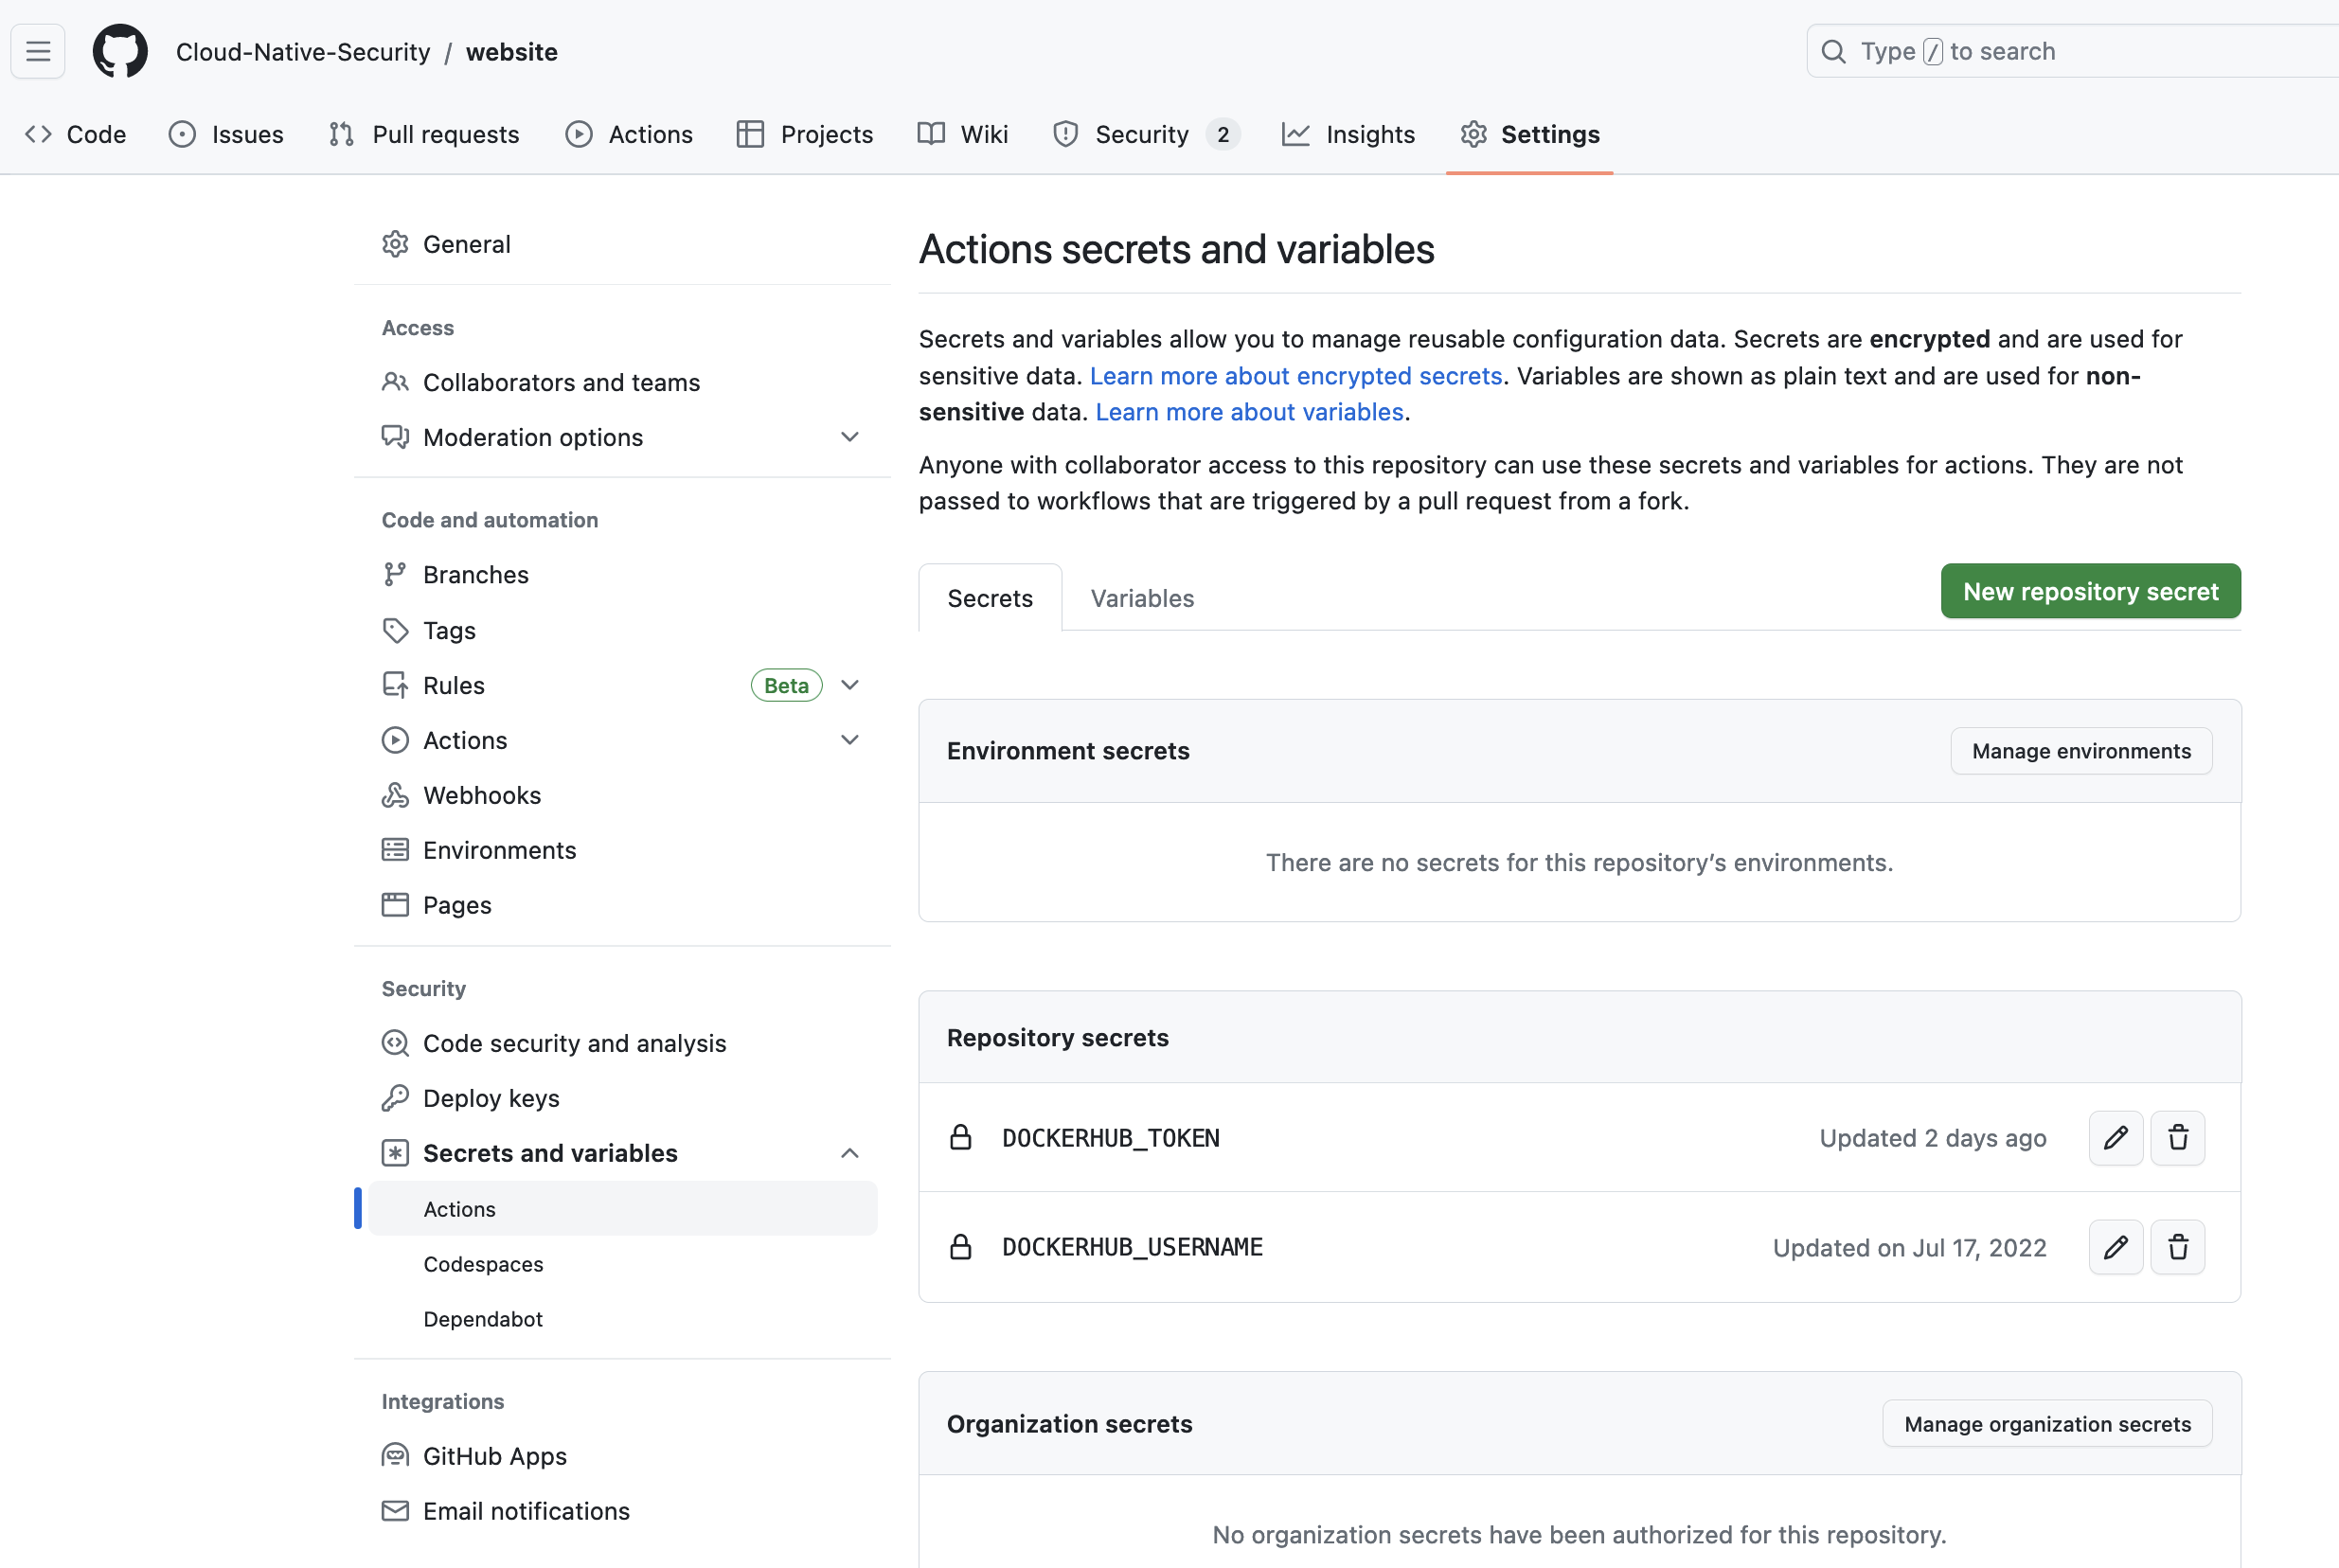
severity: 'CRITICAL,HIGH'To use this workflow, you will have to add your Docker username and access token to the GitHub secrets. This is done in the Settings tap of your repository, then navigate to secrets and variables and set the variables under the Repository secrets section:
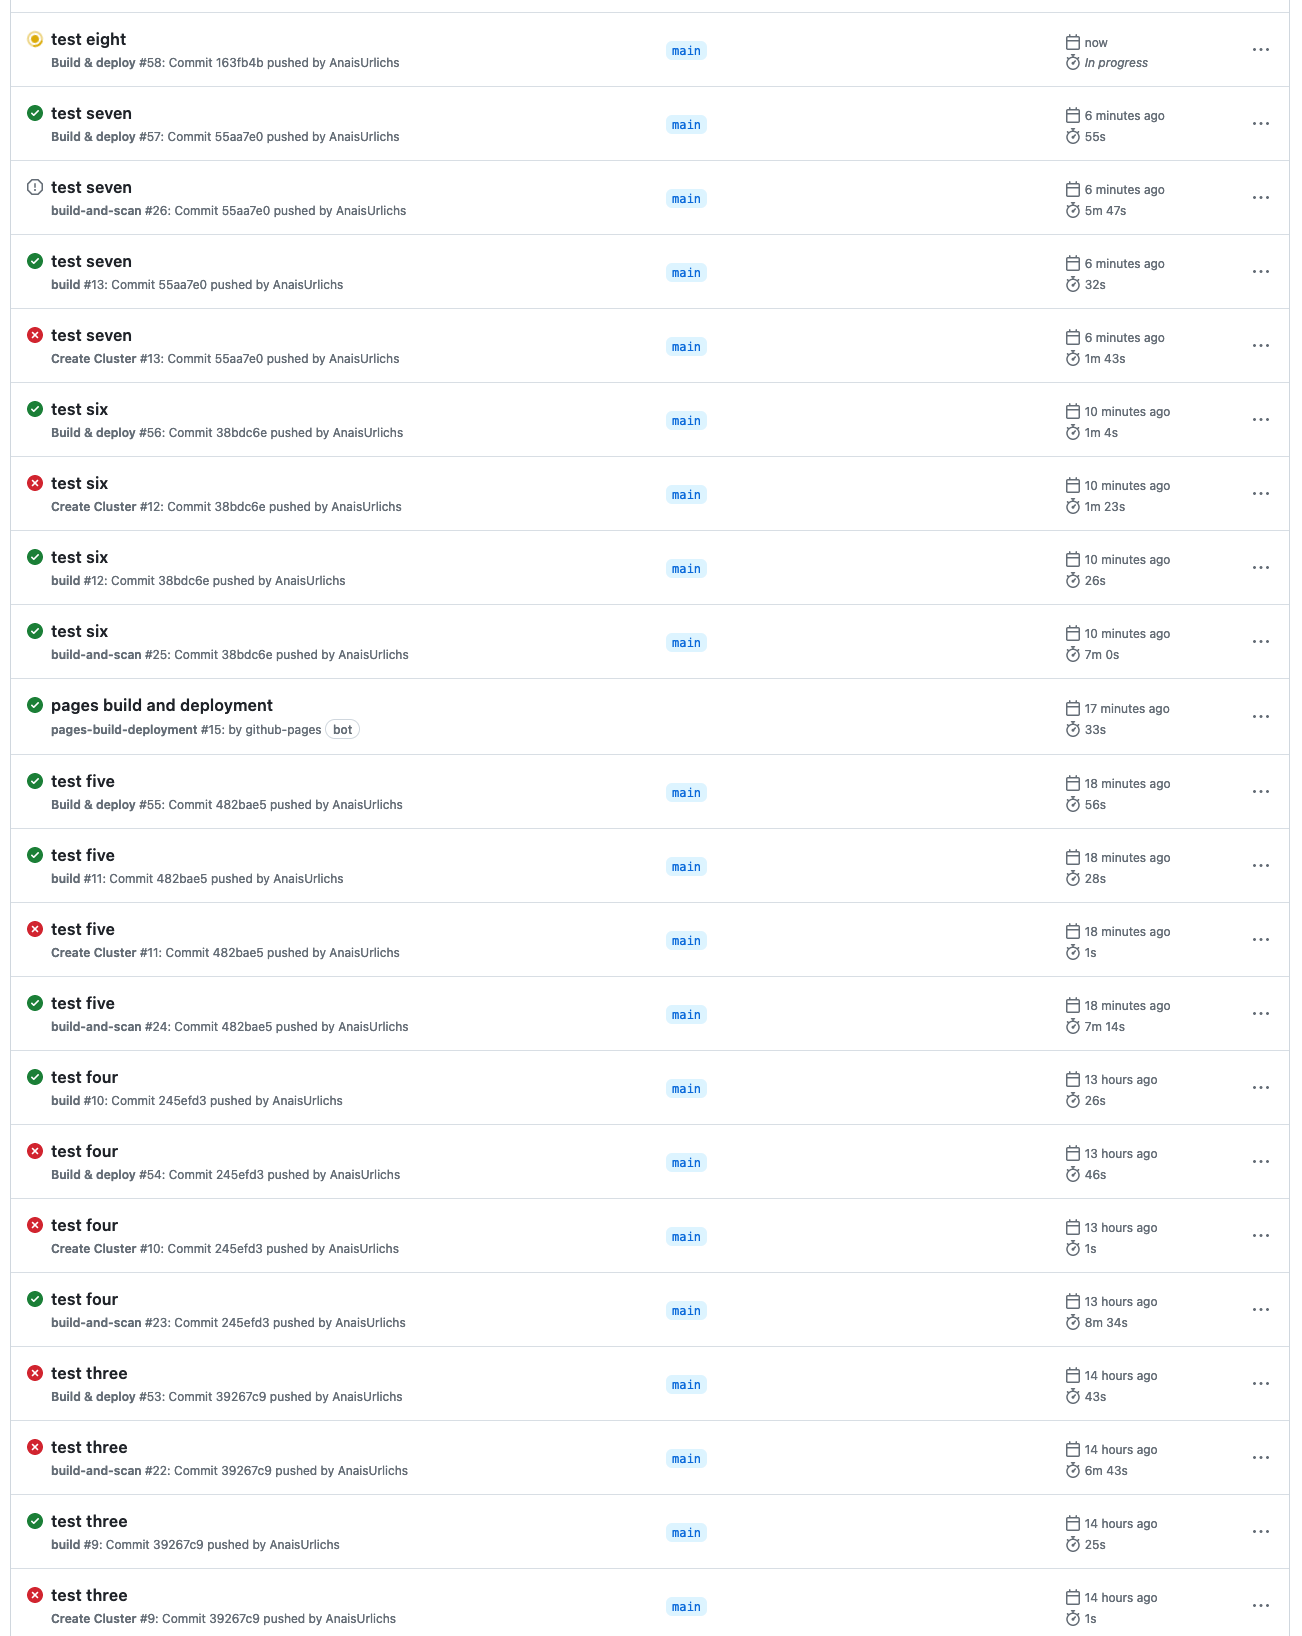
Once the secrets have been added, it is possible to run the workflow.
Additional resources
For more detailed tutorials, check out the following videos:
- GitHub Actions Tutorial | From Zero to Hero in 90 minutes (Environments, Secrets, Runners, etc)
- GitHub Actions - Supercharge your GitHub Flow