Getting started with Kubernetes: kubectl and microk8s on Ubuntu
Your application might be generating or using multiple Docker containers, to manage those can easily become difficult. In this case, you probably have looked already at Kubernetes. Kubernetes is a container orchestration tool. Meaning in plain, simple English that it can help you manage your Container Resources through automating container management, deployment and scaling resources.
Now, when you get started with Kubernetes, you might not want to set-up a cluster in Google Cloud, or AWS, right away. Alternatively, you could use a Kubernetes playground environment. However, anything that you will create there will be removed once the time is up or you close the application.
Thus, a better alternative might be using minikube or microk8s. Depending on your operating system, minikube might be difficult to install (at least I had problems). Thus, microk8s might be a great alternative to get you started in minutes. Arguably, if you are running on Linux, it might be a better alternative.
If you are interested in a comparison between minikube and microk8s, check-out this post on the Codefresh blog. This post will focus on microk8s. However, if you are curious, head over to the minikube documentation.
Let's get started! 🏋️♀️
Prerequisites: kubectl
Let's install kubectl first. It will become handy later on. If you already have kubectl installed and up and running, feel free to skip this section.
Kubectl is the Kubernetes command line tool used to manage your cluster resources. It allows you deploy container images to your cluster, inspect resources, and in general, communicate with your cluster.
Have a look at the install documentation. Since this tutorial is focused on using kubectl and microk8s on your Linux machine, we are going to follow the respective install option.
We are going to install kubectl via snap with the following command:
snap install kubectl --classic
Once done, verify that it is installed:
kubectl version --client
Getting started with microk8s
Installation
I followed the installation guide, which has been pretty straight-forward. Note that I am on Ubuntu. However, it is possible to run micro8s on MacOS and on Windows. In this case, it will set-up a Linux VM to run.
Install
sudo snap install microk8s --classic
At this points, you can already use microk8s if you have kubectl installed. E.g.
microk8s kubectl get nodes
Note that if it does not work, try to close and re-open your terminal so that the changes take effect.
Connecting kubectl with microk8s
In this case, you are using the microk8s version for operating kubectl. This allows you to keep different versions of kubectl separate. However, if you are just getting started, it might be confusing. Additionally, we don't want to be using both commands every time that we have to access any Kubernetes resources operated by microk8s. The chances are too high that we are going to spell one or the other wrong.
Set-up the kubeconfig file by running these commands, one after the other:
cd $HOME
mkdir .kube
cd .kube
microk8s config > config
And then connect microk8s to kubectl:
kubectl config use-context microk8s
You can verify that both are connected through checking the context
kubectl config get-contexts

Note that if this command does not work, it might be because they are not connected yet. Run the same command with microk8s at the beginning to check what kubectl is currently connected to:
microk8s kubectl config get-contexts
Note that if you are on Windows, please follow the documentation as the commands will be different.
Start – Stop
Microk8s will run until you decide to stop it. In case you reboot your machine, it will automatically restart. (At least that's what the documentation says; I had to start it to make it work. Thus, in case, it is not working for you, make sure to have microk8s running.)
To start and stop microk8s run the following commands
microk8s start
and
microk8s stop
Setting-up and Running Your First Application in Your Kubernetes Cluster
After you finish the set-up and have everything working, you might be thinking "ok, so what now?". Well, you have several options, including the following:
- Go ahead and use your existing application. To follow the steps below, make sure that it has a Dockerfile that allows you to successfully build a Docker image
- Set-up your own project; here is an example that you could follow
- Or, alternatively, clone this repository and follow along.
Prerequisites: For this section, you want to have Docker installed. I should probably make another tutorial on that one 😊
Clone the repository:
git clone git@github.com:anais-codefresh/react-article-display.git
Then change into the application
cd react-article-display
Build the Docker image:
docker build -t <dockerAccount/name of the image: image tag> .
Your output should be something like this:
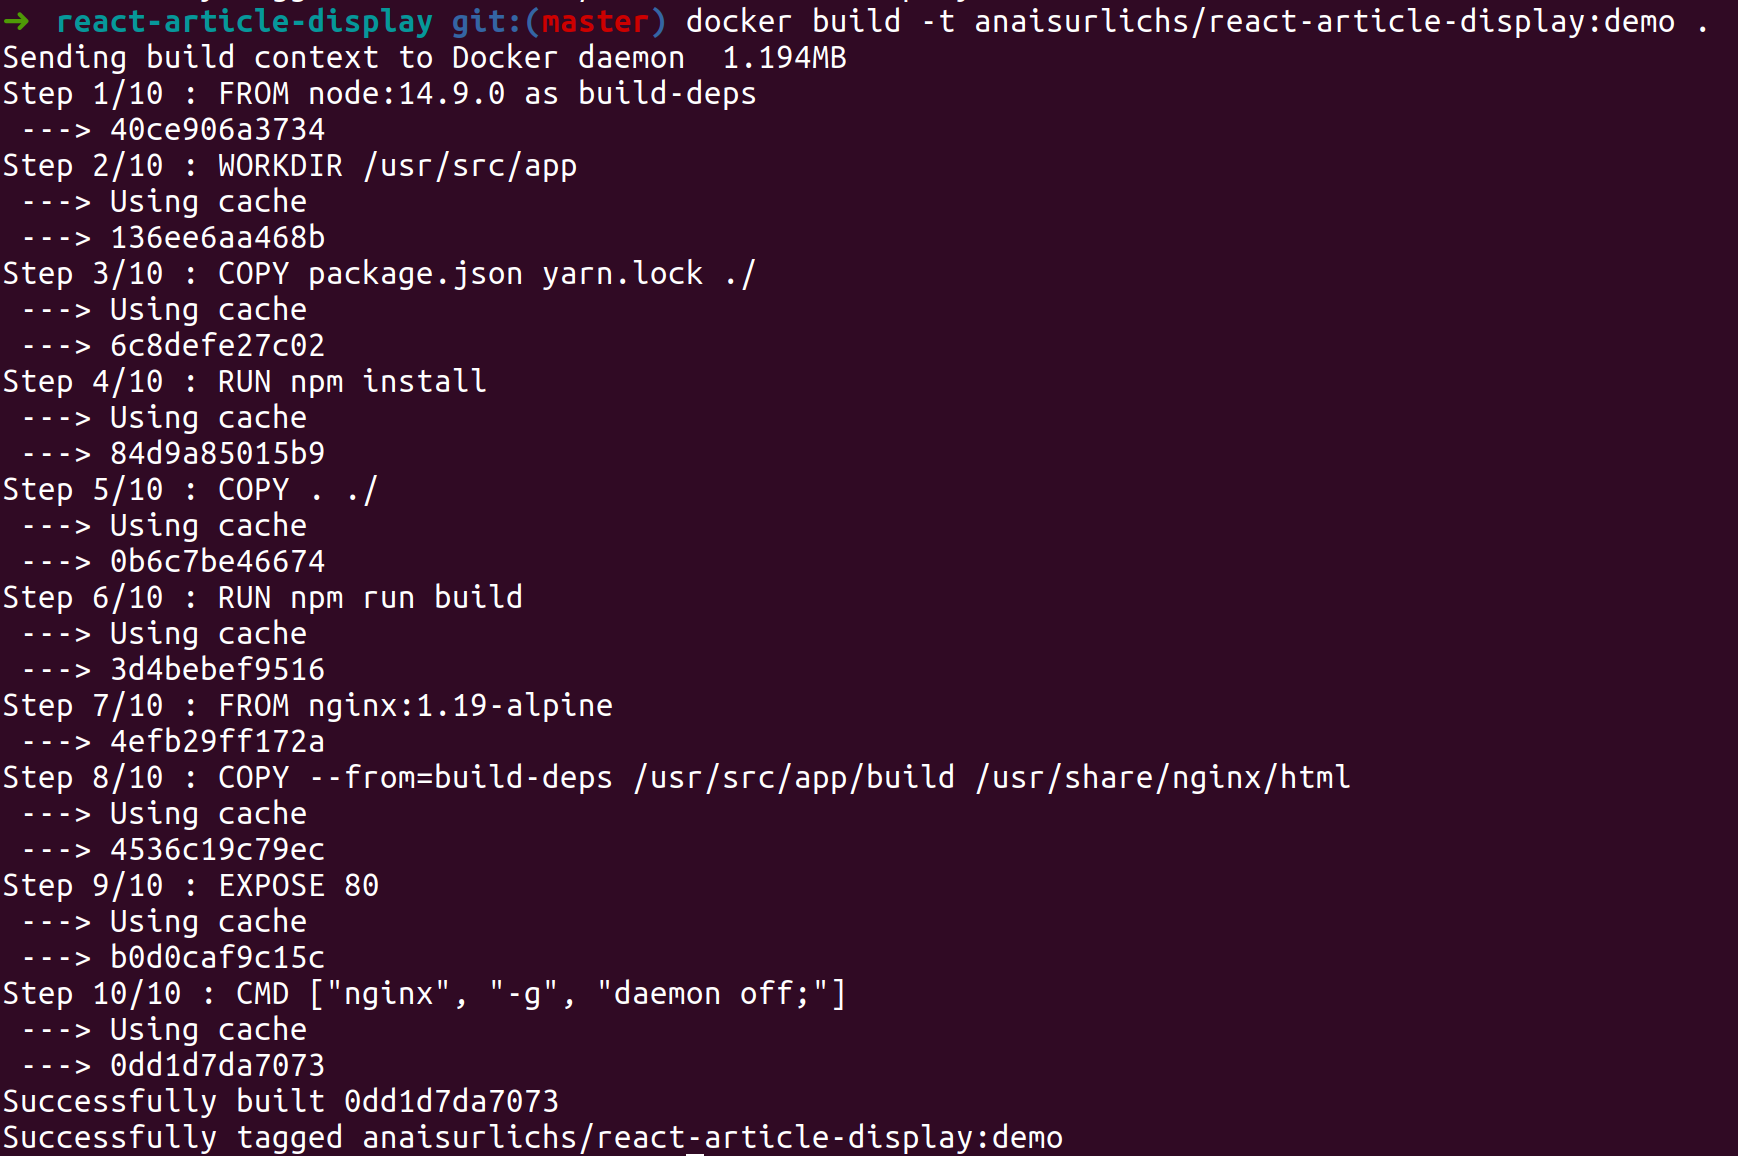
In my case, this would look similar to
docker build -t anaisurlichs/demo-example:master .
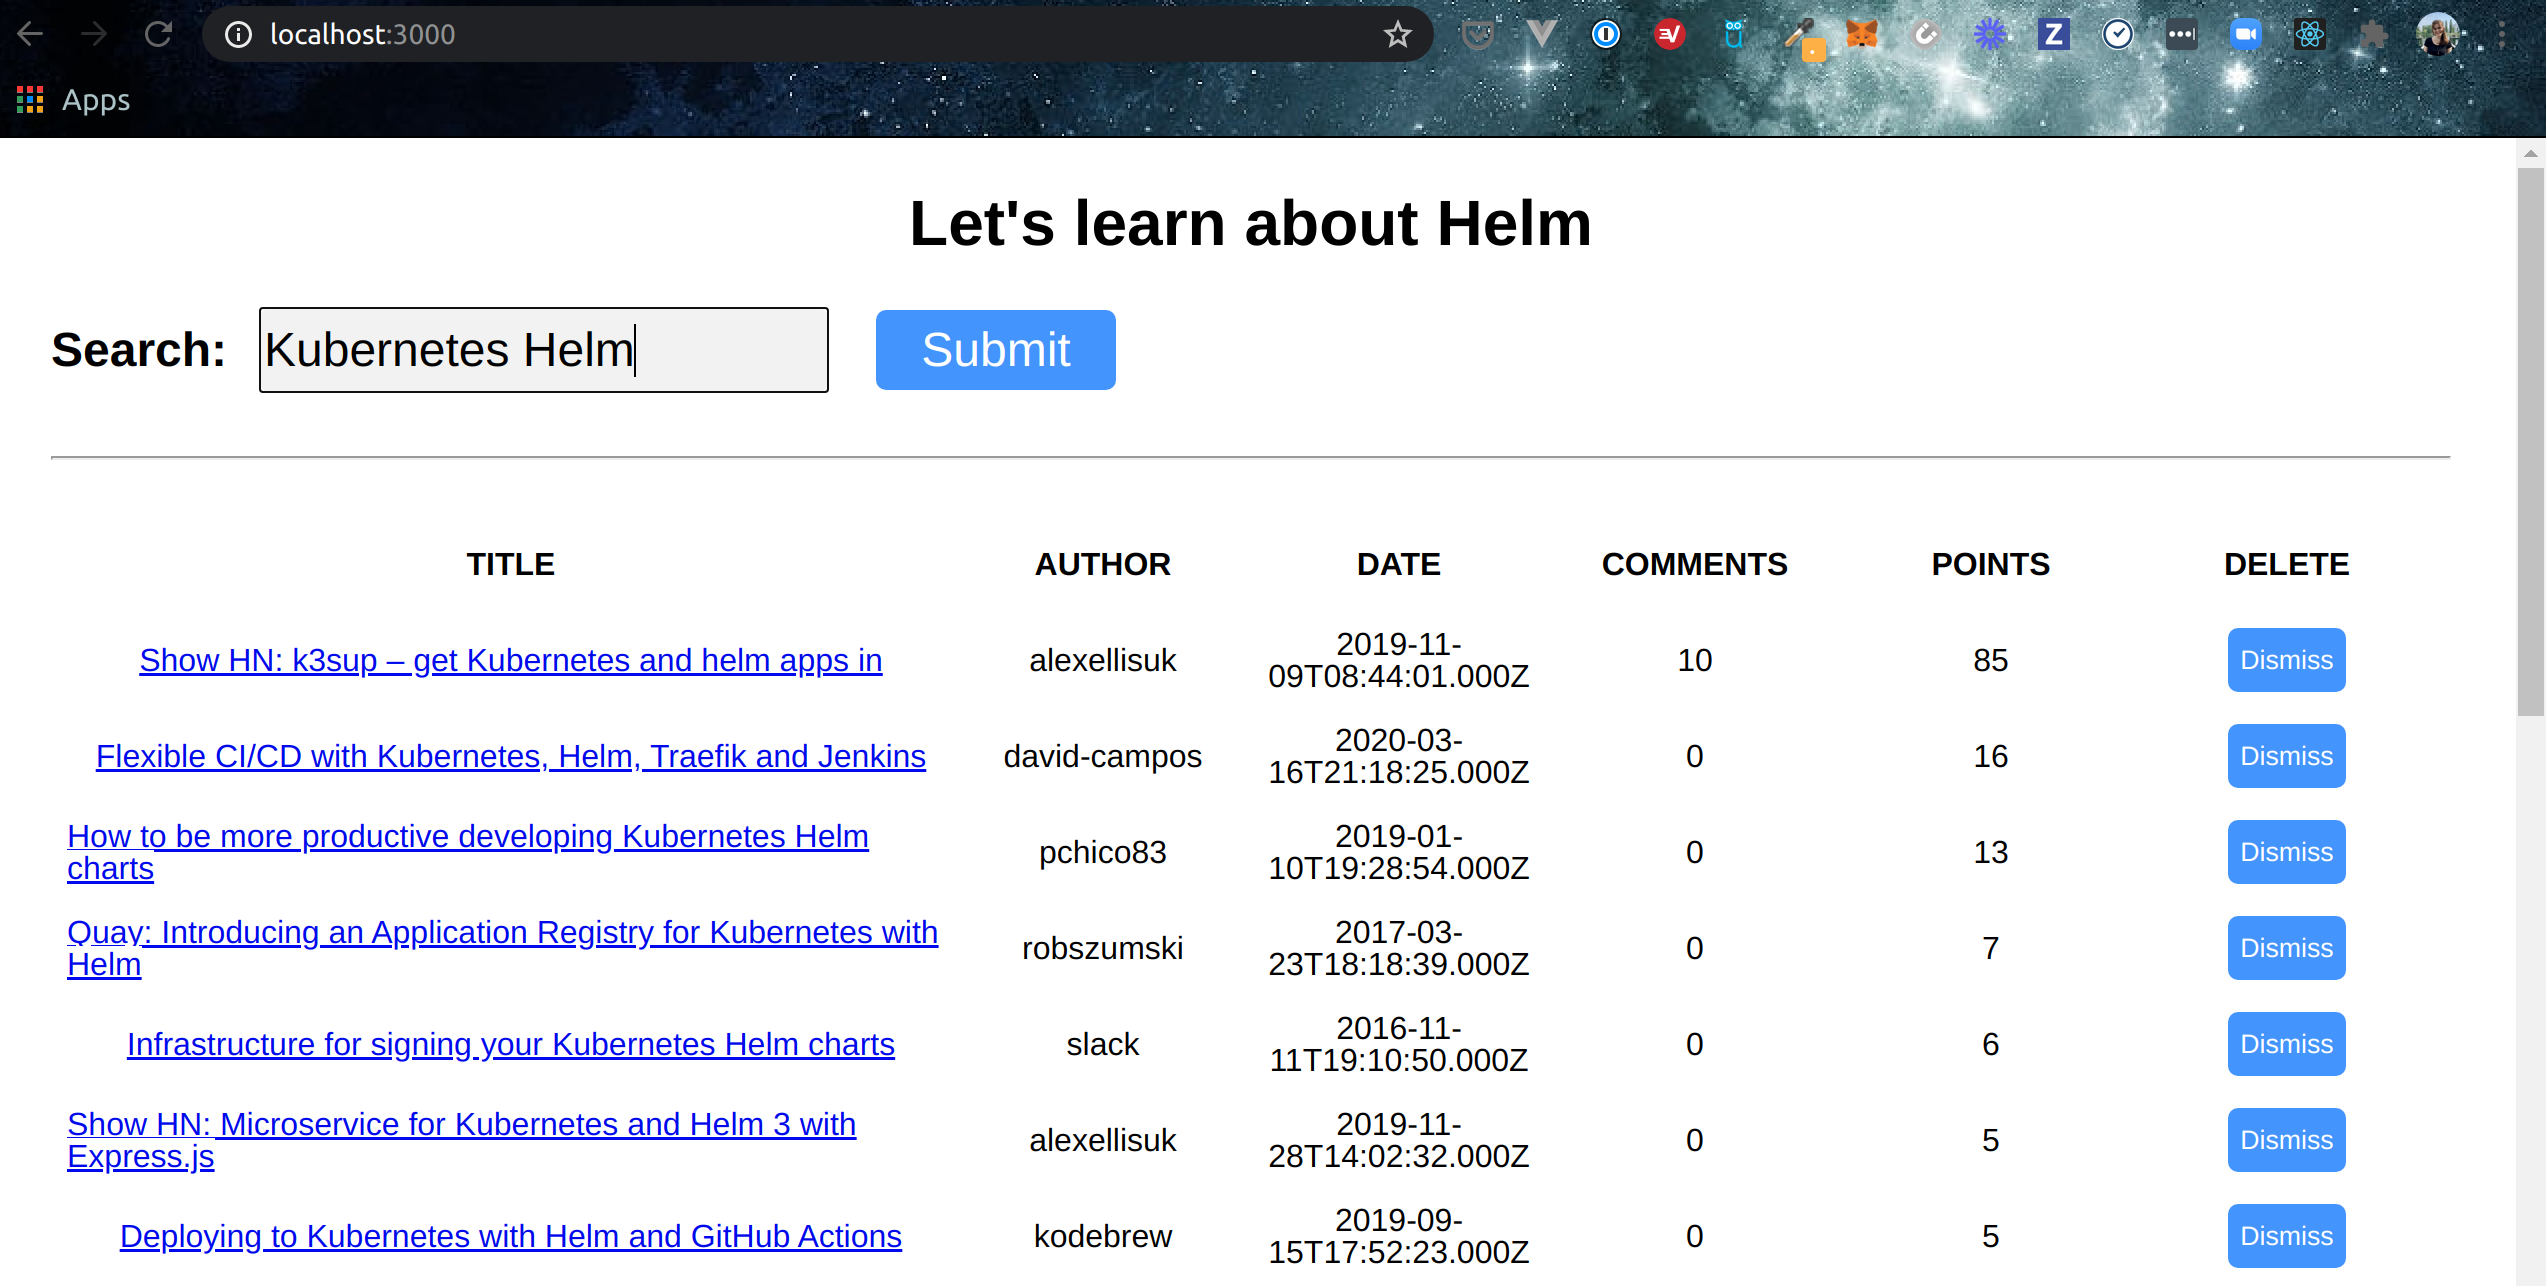
Make sure that you can run the Docker image:
docker run -d -p 3000:80 <name of your docker image>
- -d specifies that you want to run the image in detached mode, meaning, you will still be able to use your terminal after running the image;
- -p specifies the port that you want to use – we stated in our Docker image that we want to expose port 80. Thus, we are going to map 3000 to that port.
After running the above command, you can now access your application on localhost:3000; in our case, it's going to look like this:
Now let's stop the docker image:
docker stop <container name>
The container name is the string provided after running the container with the previous command.
Now push the created image to your Docker Hub:
docker login
Provide the login information. And:
docker push <image name>
Deploy the Docker image to your cluster:
kubectl run my-app-image --image anaisurlichs/react-article-display:demo
Make sure that it is in the cluster running:
kubectl get pods
Now we can forward the application from the cluster
kubectl port-forward my-app-image 3000:80
At this point it might complain that you port 3000 is taken. Make sure you have stopped the image as described above. Now you should be able to access your application again at localhost:3000

Further Reading & Tutorials:
If you are curious to learn more, here are some resources:
- Full course on Docker and Kubernetes https://youtu.be/bhBSlnQcq2k
- Free course on edx by the Linux Foundation https://www.edx.org/course/introduction-to-kubernetes
- Kubernetes handbook by freecodecamp https://www.freecodecamp.org/news/the-kubernetes-handbook/
Summary
Yeyy! You have reached the end of the tutorial!
I hope this tutorial was helpful. If you have followed along, you have first installed kubectl, then microk8s, you hopefully became comfortable with how commands in microk8s are going to be used. And at the end, we set up our Docker image in our Kubernetes cluster.
If you have any comments, suggestions on how to improve this tutorial, feel free to reach out, I would love to hear from you.
If you are interested learning more about Kubernetes and other DevOps related content, here is my public learning directory:
Also, make sure to subscribe to my newsletter and follow me on Twitter to hear the latest (of what I know) on DevOps, CI/CD and automation 🥳